There’s nothing quite like the calming fragrance of lavender wafting through the air on a warm summer day. If you love the look and scent of lavender as much as I do, you’ll be delighted to learn that it’s incredibly easy to propagate lavender and grow more plants from just one starter plant.
Propagating simply means creating new lavender plants from the existing ones, either by planting seeds or taking stem cuttings. Not only is it satisfying to grow your own lavender from scratch, but it’s also much more cost-effective than buying new potted plants every year.
Even if you’ve never propagated anything before, have no fear! Lavender is one of the most forgiving plants for beginners. With just a bit of time and some simple supplies, you can build up your own lavender garden with plentiful plants.
Table of Contents
Choosing the Best Propagation Method for Lavender
When it comes to propagating lavender, you have two main options: growing from seeds or rooting stem cuttings. Each method has its own pros and cons:
Growing lavender from seeds:
- Pro: You can start with a huge variety of lavender types and cultivars
- Con: Seeds can be slow to germinate and have lower success rates
Taking lavender cuttings:
- Pro: Cuttings root fairly quickly, and you get an exact clone of the parent plant
- Con: You’re limited to propagating the lavender variety you already have
For most home gardeners, taking stem cuttings tends to be faster and more reliable, especially if you have an established lavender plant you love. But seeds offer more variety if you’re interested in trying new lavender cultivars.
When to Propagate Lavender?
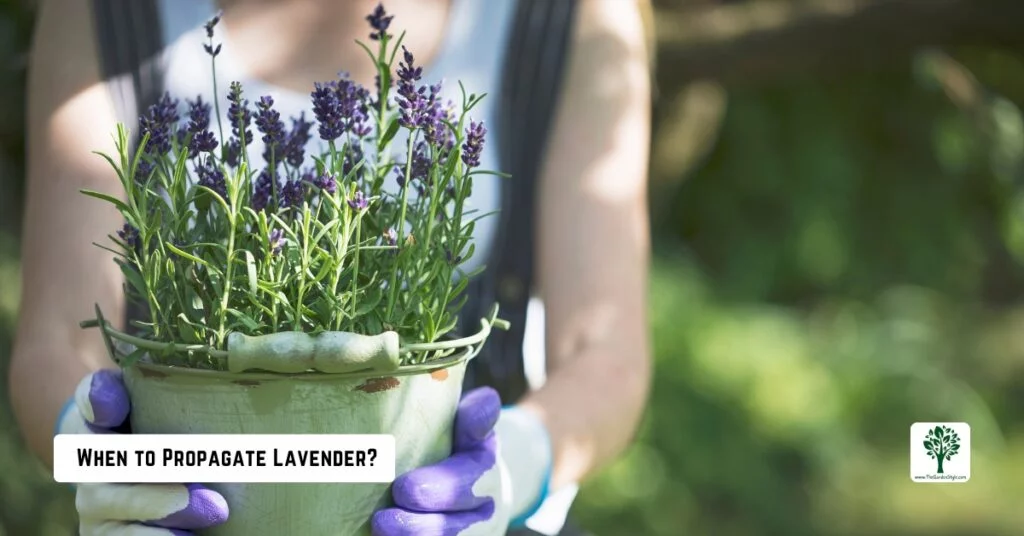
No matter which propagation method you choose, the best time to propagate lavender is in spring or summer. Warmer temperatures and longer daylight hours give new lavender plants the ideal start for getting established.
For propagating from seeds, aim to start them indoors 6-10 weeks before your last spring frost date. This allows the seedlings to develop sturdy roots and be ready to transplant outdoors once temperatures warm up.
If taking cuttings, wait until the parent lavender plant is blooming and actively growing in late spring or early summer. The softwood stem cuttings root most reliably during this period of vigorous growth.
How to Propagate Lavender from Cuttings
The best time to take lavender stem cuttings for propagation is in spring or early summer when the plant is blooming and actively putting out fresh, new growth. This “softwood” stem growth will root much more easily than older, woodier stems.
For each new plant you want to propagate, you’ll need a 4-6-inch cutting from the tip of a stem. Try to choose versatile, healthy stems without any flower buds. Cuttings with buds tend to put their energy into blooming rather than rooting.
When taking cuttings, use clean, sharp pruners to make angled cuts just below a leaf node (where leaves are attached to the stem). This exposed node area will help with rooting.
Preparing Lavender Cuttings for Propagation
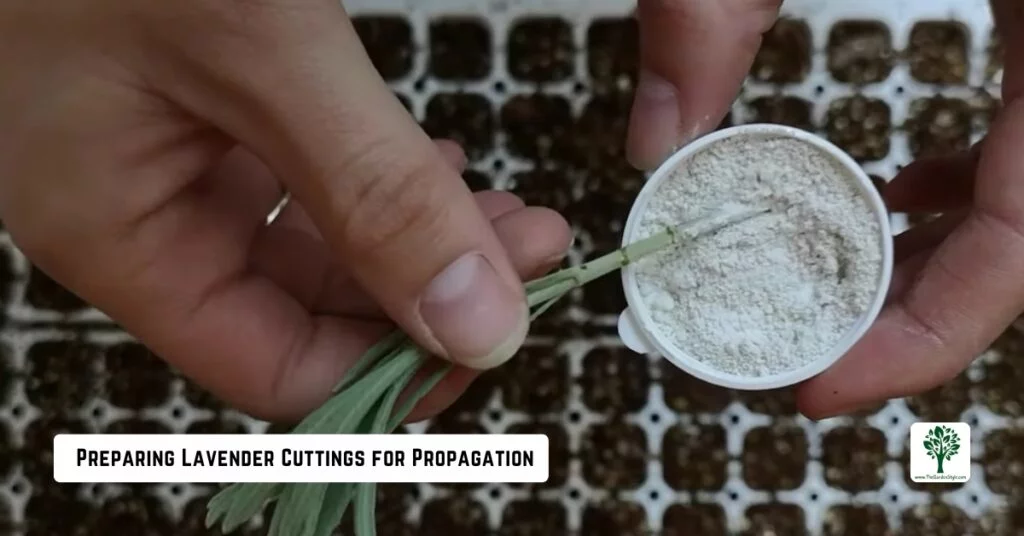
Once you’ve taken your lavender cuttings, you’ll want to remove the lower leaves from the bottom 2-3 inches of each stem. That prevents rotting later on.
Finally, I highly recommend dipping the ends of your prepared lavender cuttings in root hormone powder. This step significantly enhances their chances of successful propagation.

- FASTEST ROOTING POWDER FOR PLANT CUTTINGS: Hormex rooting hormone powder is a unique product that encourages the natural process of rooting new plants from cuttings. Please check the list of plant varieties and rooting powder strength in the product photos.
Rooting Lavender Cuttings
To root your lavender cuttings, you’ll need a well-draining rooting medium. A mix of one part perlite or coarse sand to one part peat moss or coconut coir works well. You can also use a purchased seed-starting or cutting mix.
Fill a pot or tray with several inches of your sterile rooting mix. Make holes spaced 3-4 inches apart using a pencil, stick, or dibbler tool. Then, water the mix thoroughly until it’s evenly moist but not soaked.
Planting Lavender Cuttings
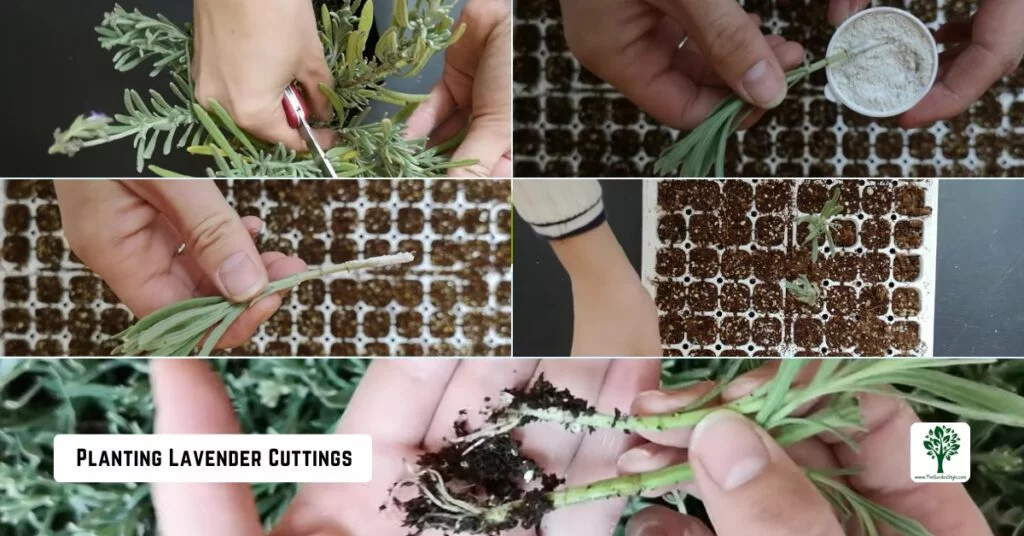
Dip the ends of your prepared lavender cuttings in rooting hormone powder if desired. Then, stick each cutting into its own hole in the rooting medium, gently firming the mix around the base.
For the best results, try to bury the nodes where you removed leaves, as these are prime areas for new root growth to emerge. You can pot multiple cuttings together in one tray or container.
Once planted, water the cuttings again with a gentle spray to settle the soil. Then, cover the tray with a plastic dome lid or tent to create a humid micro-greenhouse environment.
Caring for Rooted Lavender Cuttings
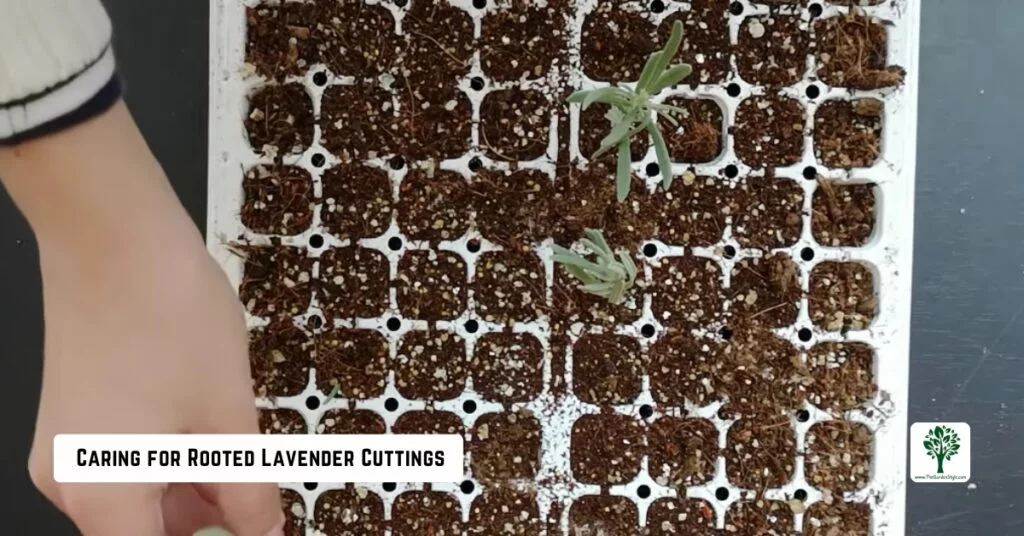
Bright, indirect light is ideal for getting lavender cuttings to root. Place them in a warm spot out of direct sun, aiming for temperatures between 65-75°F.
A heat mat can provide gentle bottom warmth to encourage further rooting. Just be sure to remove the cuttings from the heat once new growth appears.
The rooting mix should stay evenly moist but not sopping wet. Check it daily, and water it with a gentle sprinkler when the surface becomes dry to the touch. Keeping the humidity high is critical. Learn more about how often to water lavender.
After 4-6 weeks, you should start to see new growth emerging—a sign that the cuttings have successfully rooted. At this point, you can remove the plastic dome lid and allow the cuttings to acclimate to lower humidity levels.
Once your rooted lavender cuttings have developed a healthy root system (gently tug on the cutting to test this), it’s time to pot them up individually. Carefully knock each rooted cutting out of the propagation tray and transplant it into its own container with potting mix.
Water the newly transplanted cuttings well, allowing any excess to drain out the bottom. Then, gradually introduce them to higher light conditions over the next 1-2 weeks. Soon, you’ll have sturdy little lavender plants ready for their permanent homes in the garden!
How to Propagate Lavender from Seeds
To sow lavender seeds, you’ll need a high-quality seed-starting mix along with some nursery flats or cell trays. Avoid using garden soil, which can contain pathogens and may be too heavy for delicate seedlings.
Instead, opt for a sterile soilless potting mix made for seedlings. These mixes often contain ingredients like peat moss, perlite, and vermiculite to provide ideal moisture retention and drainage.
Fill your nursery containers to within 1/2 inch of the rim and lightly tamp down the soil. Then moisten the mix with a spray bottle or fine mist setting on your watering can.
Sowing Lavender Seeds
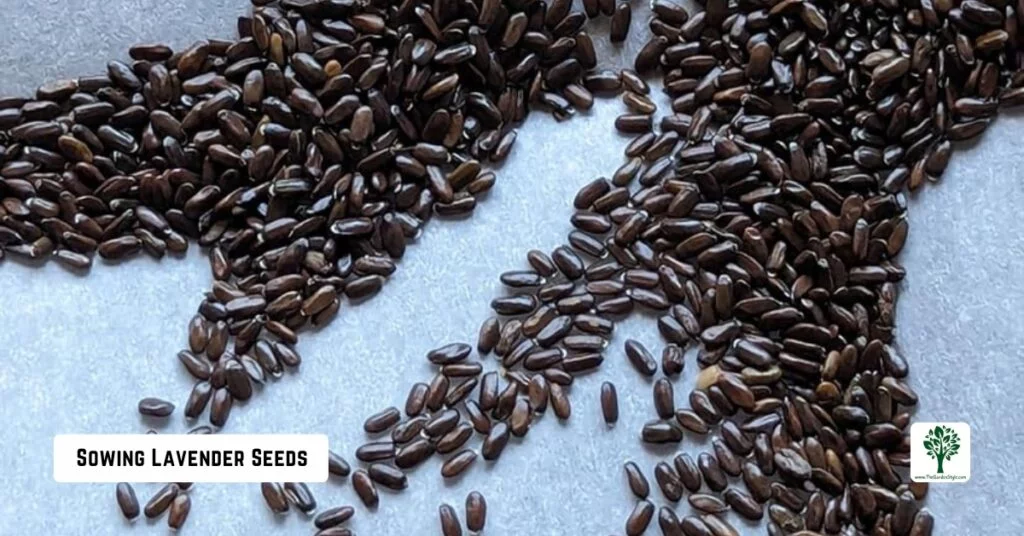
Lavender seeds are tiny, so you’ll want to space them out evenly across the soil surface rather than dropping them in clumps. A simple trick is to mix the seeds with a little dry sand first, then sprinkle this seed/sand mixture over the pre-moistened soil.
You can cover the seeds with a light sprinkling of seed-starting mix or just gently press them into the surface of the soil. Cover the containers with a clear plastic lid or wrap to create a greenhouse effect and keep the seeds consistently moist.
Caring for Lavender Seedlings
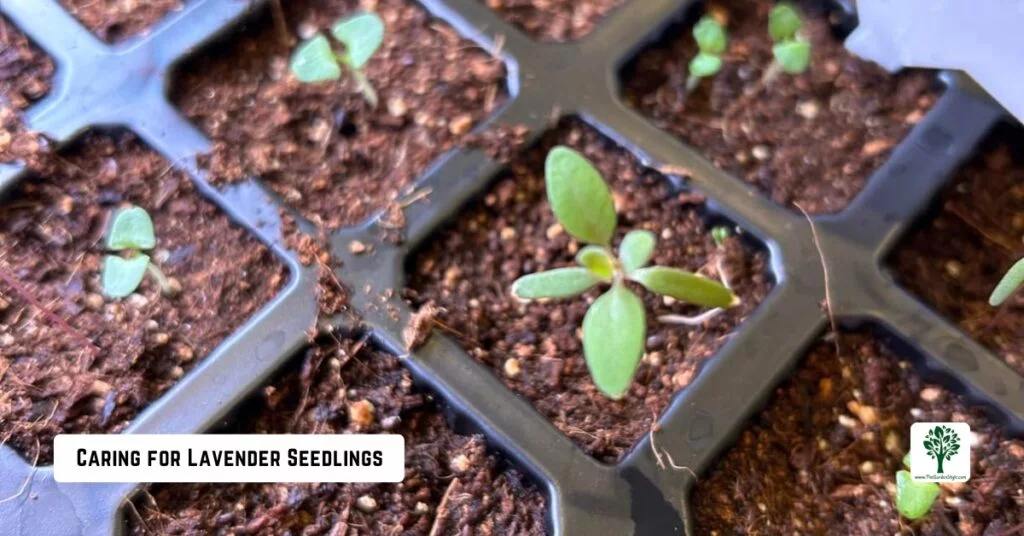
After sowing, place the seed trays in a warm location with bright, direct light. A sunny, south-facing window is ideal if growing lavender seedlings indoors. Supplementing with a seed-starting heat mat can also encourage faster, more even germination.
Once the seeds sprout, make sure the seedlings receive ample light—aim for at least 6 hours per day. Using a fluorescent grow light is helpful if you don’t have a naturally sunny spot. Keep the lights just a few inches above the seedlings.
Consistent moisture is critical when the lavender seeds are first germinating, and the seedlings are young. Check daily and water the soil whenever the top 1/2 inch feels dry to the touch.
However, lavender is prone to damping off disease if overwatered, so avoid letting the seedlings sit in soggy soil. Make sure your containers have good bottom drainage to prevent this issue.
Once the seedlings develop their first set of true leaves, you can start watering slightly less frequently to encourage stronger roots. Allow the top inch of soil to dry out before watering again.
Hardening Off Lavender Seedlings
About 6-8 weeks after germinating (or when nighttime temperatures stay reliably above 50°F), it’s time to start hardening off your lavender seedlings before transplanting them outdoors. This hardening-off period allows them to adjust to outdoor conditions gradually.
Start by placing the seedling trays outside in a sheltered spot with partial shade for 2-3 hours per day. Increase their outdoor exposure time for 1-2 weeks until they can remain outside full-time. This process toughens up the lavender stems and leaves so they don’t get shocked by the sun and wind outdoors.
Recommended reading: How to Dry Lavender At Home
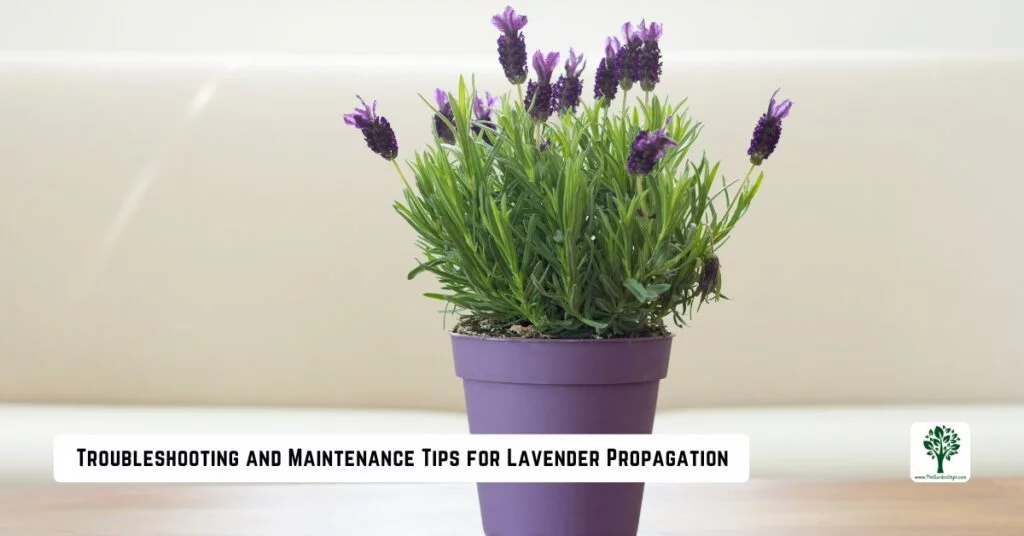
Troubleshooting and Maintenance Tips for Lavender Propagation
Propagating lavender is generally straightforward, but you may occasionally encounter a few common hiccups when attempting to propagate lavender:
- Seeds fail to germinate: This can happen if the lavender seeds are too old/no longer viable. It’s best to use fresh seeds each season.
- Cuttings wilt or rot: Improper humidity levels are often the culprit. Make sure the rooting medium stays moist but not soaked.
- Plants become leggy or stretched: More light is needed! Lavender seedlings and cuttings require ample bright light to grow stocky and strong.
- Damping off disease: This fungal issue causes sudden seedling death and can spread quickly. Improve air circulation and allow soil to dry out between waterings.
Once you have your new lavender plants established, follow these easy-care tips:
- Choose a sunny, well-drained spot in the garden with at least 6-8 hours of direct sunlight
- Amend the soil with compost or other organic matter to improve drainage
- Allow the soil to dry out somewhat between waterings—lavender prefers drier conditions
- Prune yearly just after blooms fade to promote bushier growth
- Apply a layer of mulch around plants to retain moisture and suppress weeds
- Divide plants every 3-4 years in early spring to rejuvenate growth
With just a bit of care and attention, your propagated lavender plants will bring beautiful colors, delightful fragrances, and a calming atmosphere to your garden for years to come!
Final Conclusions
Whether you’re looking to fill your yard with the delightful fragrance of lavender or expand your existing plants, propagating lavender offers an easy and cost-effective solution. By following the proper steps to propagate lavender from seeds or by rooting cuttings, you’ll reap the rewards of an abundance of these charming perennials.
So, grab your pruners or seed packets and start propagating! With some basic supplies and a little patience, you’ll soon have plenty of lavender to enjoy in your garden, home décor, and DIY projects. The possibilities are endless when you multiply those marvelous lavender plants.
Frequently Asked Questions
While it is possible to root lavender cuttings in water, this method is less reliable than using a proper rooting medium. The cuttings often develop small, weak root systems that struggle after transplanting. For best results, root lavender in a well-draining soil or soilless mix.
To avoid overcrowding, sow just 2-3 lavender seeds per pot or cell. The tiny seedlings need ample space for strong root development. You can thin out any extras once they sprout.
While lavender seeds can be more finicky than taking cuttings, they aren’t overly difficult for the home gardener to start from seed. Just follow proper seed-starting techniques like using a sterile seed-starting mix, bottom heat, and bright light. Be patient, as lavender seeds can be slow to germinate.
If this post about how to propagate lavender was helpful, please share it: