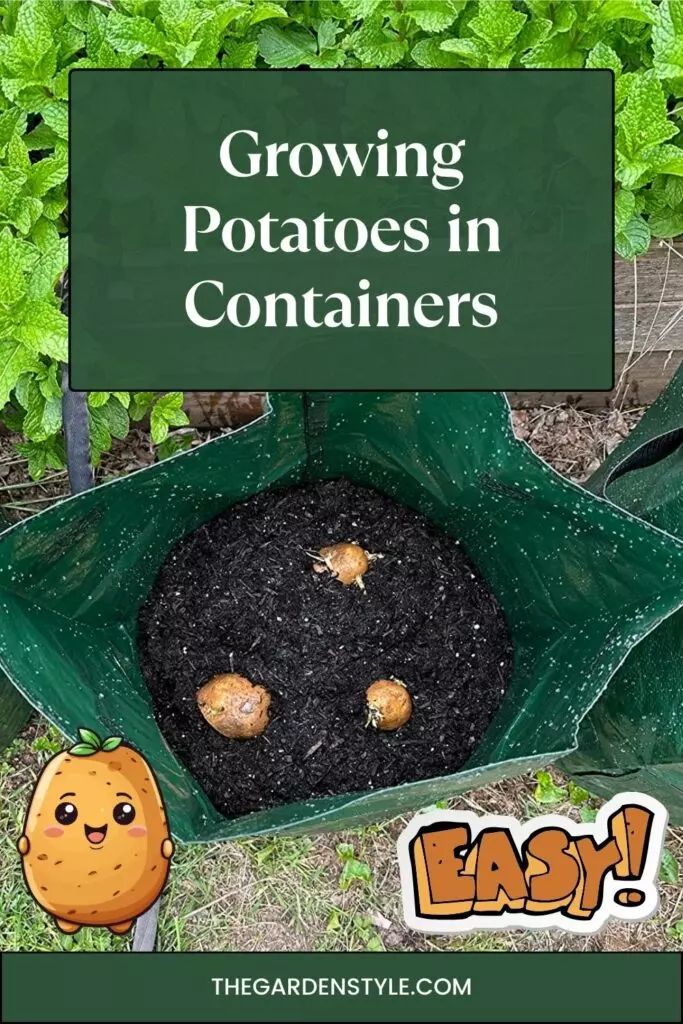
Choosing to grow potatoes in a container is a fantastic option for gardeners with limited space. With just a few simple steps, you can enjoy a bountiful harvest of homegrown potatoes on your patio, balcony, or doorstep. In this article, we’ll cover everything you need to know about container potato gardening, from choosing the correct container and variety to harvesting and storing your crop. Let’s dig in!
Table of Contents
Types of Containers for Growing Potatoes
Growing potatoes in containers is a popular option, especially for people with limited garden space. There are various types of containers you can use for growing potatoes. Here are some common options:
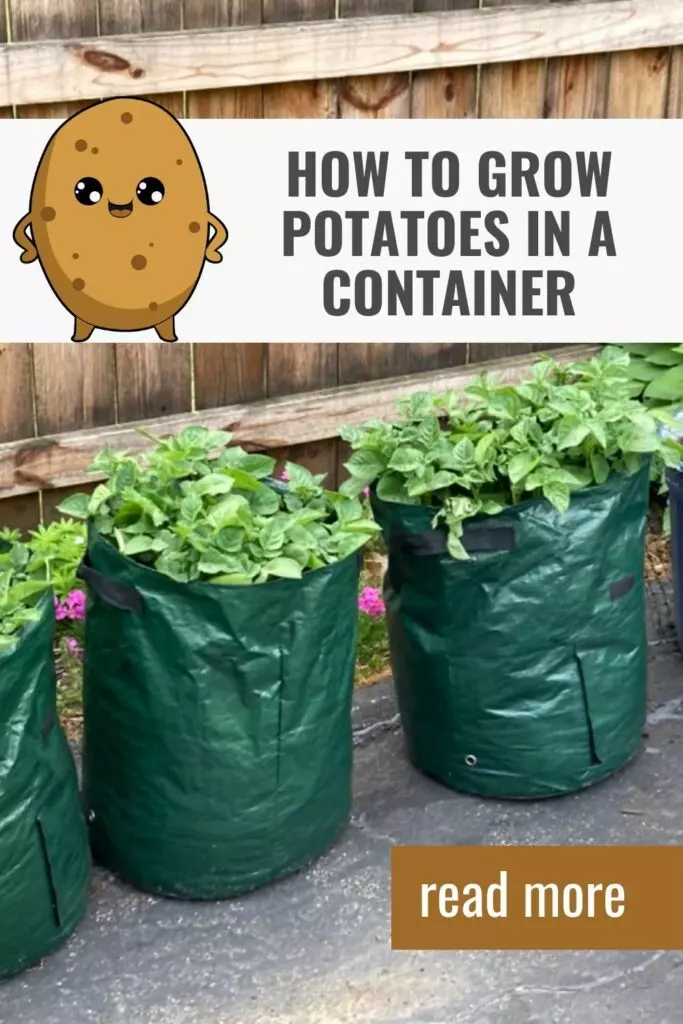
Grow Bags: These are fabric containers designed specifically for growing plants. They provide good aeration and drainage. Grow bags come in different sizes, and they are often made from breathable materials that prevent overheating.
Garden Bags: Similar to grow bags, these are sturdy bags specifically designed for gardening. They come in various sizes and can be a convenient option for potato cultivation.
Plastic Pots: Regular plastic pots, ranging from 5 to 10 gallons or larger, can be used for growing potatoes. Make sure the pots have drainage holes at the bottom to avoid waterlogging.
Wooden Crates: Old wooden crates or boxes can be repurposed as potato containers. Ensure there are gaps or spaces between the slats to allow for proper ventilation.
Barrels or Tubs: Large barrels or plastic tubs work well for growing potatoes. Drill drainage holes in the bottom and partially up the sides to prevent water accumulation.
Straw Bale Towers: Construct towers using straw bales, layering potatoes and soil as the plant grows. This method allows for vertical growth, maximizing space.
Tires: Stacking old tires and filling them with soil is a common method. As the plant grows, you can add more tires and more soil.
Bucket Towers: Stacking buckets on top of each other with drainage holes can create a tower for growing potatoes vertically.
Recycled Containers: Old buckets, plastic containers, or anything with sufficient depth and drainage can be repurposed for growing potatoes.
Selecting a Container
The first step in container potato growing is choosing an appropriate container. Consider the following factors:
Size: Choose a container that is at least 12 inches (30 cm) deep and 18-24 inches (45-60 cm) wide. This will provide enough room for potato plants to form tubers. Larger containers can accommodate more seed potatoes.
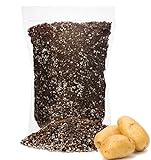
Material: Pick a sturdy container made of plastic, wood, metal, or lightweight, non-woven fabric 7-gallon potato grow bags like VIVOSUN grow bags. Make sure it has drainage holes in the bottom to prevent soggy soil. Avoid porous materials like terra cotta that allow too much water evaporation.
Drainage Holes: Essential for healthy roots and preventing rot. Add extra holes if necessary.

- Ideal Container: Fabric grow bags are lightweight while pots are heavier; This potato bag, made from 300g non-woven fabric, is an easy, space-saving solution to grow potatoes
Choosing a Potato Variety
Potato varieties are classified by maturity time: early season, midseason, and late season.
Early Season: Good choices for containers include Irish Cobbler, Warba, Red Gold, and Viking Purple. These mature in 60-70 days.
Midseason: Try Yukon Gold, Kennebec, Red Pontiac, or Carola, which take 80-90 days to mature.
Late Season: Better suited for the ground, but Russet Burbank, Purple Majesty, and Bintje can work in large containers. They mature in 100+ days.
Opt for an early or midseason variety to achieve the quickest harvests when you grow potatoes in a container.
| Variety Type | Varieties | Days to Maturity | Notes |
| Early Season | Irish Cobbler, Warba, Red Gold, Viking Purple | 60-70 days | Best suited for containers, fast harvests |
| Midseason | Yukon Gold, Kennebec, Red Pontiac, Carola | 80-90 days | Do well in containers |
| Late Season | Russet Burbank, Purple Majesty, Bintje | 100+ days | Require large containers |
Preparing the Soil Mix
When you grow potatoes in a container, ensure the medium is loose, fertile soil with excellent drainage. Make your own custom soil mix:
- 1 part compost or peat moss for moisture retention.
- 1 part perlite or vermiculite to prevent compacting.
- 1 part coconut coir or sterile potting mix for drainage.
- Mix in 1-2 cups of balanced organic fertilizer.
Alternatively, use a commercial organic potting mix combined with 20-30% compost. Compost provides nutrients and improves drainage. Avoid using plain garden soil, which can get too dense. Mixing in compost improves texture.
- 🌳 PROFESSIONALLY MIXED IN THE USA – Each bag is hand blended on our small family farm with premium horticultural grade ingredients: Coco Coir, Canadian Peat Moss, Perlite, Worm Castings- 5 QUART BAG
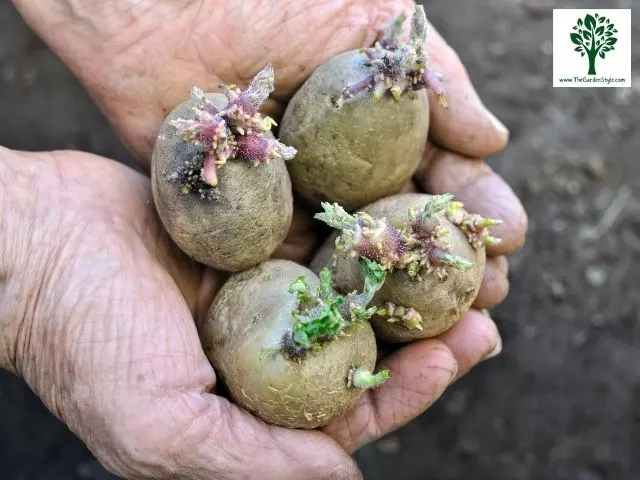
Preparing Seed Potatoes for Planting
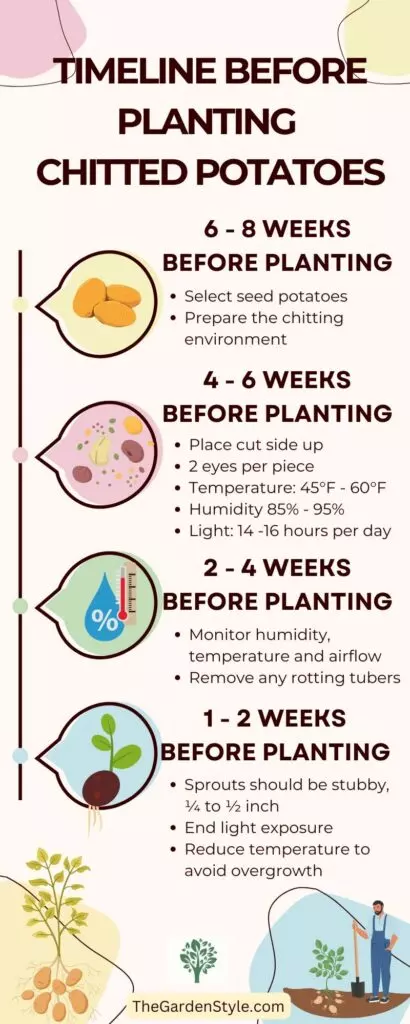
Preparing and chitting seed potatoes in advance leads to healthier, more vigorous plants.
From 6 to 8 weeks before planting, spread seed potatoes in a single layer in a bright, warm spot to encourage sprouting. This grows short, sturdy sprouts.
For larger potatoes, cut into smaller pieces 2-3 days before planting, making sure each piece has at least 1-2 eyes. Let cut pieces dry and callous over.
Chitting refers to dividing and pre-sprouting potatoes. It produces more plants from each seed potato.
Cut pieces should be 1.5-2 oz in size. Allow to dry for 1-2 days to prevent rotting.
Discard any pieces that show disease or fail to sprout.
Plant sprouted pieces with the eyes/sprouts facing up in the soil.
Taking the time to chit potatoes results in better sprouting and healthier plants. Pre-sprouting them jumpstarts growth.
Planting Seed Potatoes
Once your container is filled with enriched soil, it’s time to plant your seed potatoes. Follow these steps for proper planting:
Purchase certified disease-free seed potatoes from a garden store or catalog. Avoid using grocery store potatoes, which may carry diseases. Look for varieties suited for containers.
Prepare seed potatoes by cutting larger tubers into smaller pieces. Each piece should have 2-3 eyes or sprouts. Let cut pieces sit for 1-2 days to heal.
Determine the best time to plant based on your region – generally 4-6 weeks before your average last spring frost. Potatoes thrive in cool conditions.
Dig holes or trenches in the container’s soil mix using your hands or a trowel. Deeper holes prevent the greening of tubers.
Place 1-3 seed potato pieces in each container, spacing them 8-12 inches (20-30 cm) apart if planting multiple. More space reduces competition.
Ensure sprouts or eyes are oriented up. Plant one chitted potato, 1-2 inches (2.5-5 cm) deep. Pat down lightly.
Water thoroughly after planting until it drains from the container’s bottom. Consistent moisture is key.
Provide support like a trellis as the foliage grows if needed. Taller varieties may require staking.
Follow proper planting depth, spacing, orientation, and watering for healthy, robust potato plants. Be patient – sprouts will emerge in 2-4 weeks!
Recommended reading: Understanding the Growing Potatoes Stages
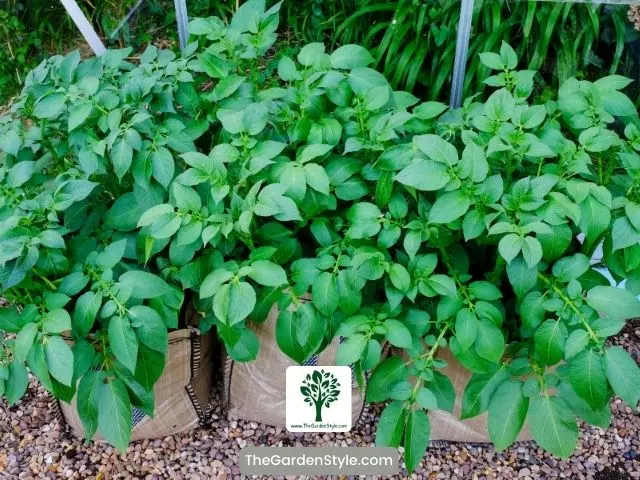
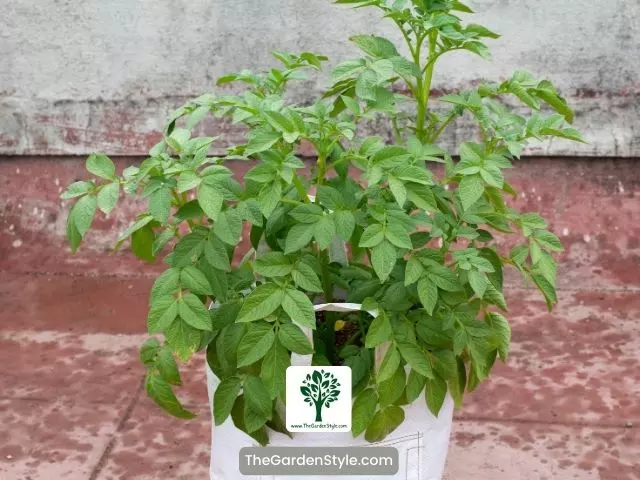
Caring for Container Potatoes
Ensuring proper care is essential when you grow potatoes in a container to foster the growth of healthy, productive potato plants. While potatoes are generally easygoing, they do have some specific needs when grown in containers. It’s important to pay close attention to water, fertilizer, sunlight, and temperature. Consistent moisture, nutrients, sunlight, and ideal temps will ensure your potato tubers develop to their full potential. The following growing conditions and care tips will help your container potatoes thrive.
Watering
Water immediately after planting. One inch of water per week is ideal, adjusting for rainfall. Water deeply, not frequently. Potatoes are drought-tolerant, but consistent moisture improves growth.
Fertilizing
Use organic fertilizer every 3-4 weeks during the growing season. Look for blends higher in potassium and phosphorous than nitrogen. Fish emulsion, kelp meal, and compost teas make good organic fertilizer options.
Sunlight
When you grow potatoes in a container, ensure they receive a minimum of 6-8 hours of full sun daily. Pick the sunniest spot possible for your container garden.
Temperature
Potatoes grow best with daytime temps of 65-80°F (18-26°C) and nighttime temps above 50°F (50°C). They can withstand light frosts, but heavy frost will damage the plants. Protect from cold snaps by covering plants with frost cloth.
Recommended reading: Best Companion Plants for Potatoes (and Plants to Avoid)
Protecting Against Pests and Diseases
While potatoes are generally sturdy plants, they are prone to some pests and diseases that can seriously impact your container crop. It’s important to be proactive and use preventative measures to protect your plants. Monitor them closely and treat issues promptly before they spread. Some common potato troubles to watch for include:
Common Pests
Aphids: These small sucking insects cluster on leaves and stems, sucking sap and spreading disease. Check the undersides of leaves and treat early infestations by blasting off with water or using insecticidal soap sprays.
Potato Beetles: Both the adult beetles and their larvae eat leaves, leaving behind telltale holes. Hand-pick early populations and use Bacillus thuringiensis once established. Cover young plants with row cover fabric.
Common Diseases
Early Blight: One of the most destructive potato diseases, early blight first shows as brown spots on leaves and stems. Wet, humid conditions favor it. Improve air circulation, avoid wetting foliage, and use disease-resistant varieties.
Late Blight: This fungal disease causes brown spots on leaves and tubers. Entire plants can be quickly defoliated. Immediately remove and destroy affected plants to prevent spread.
Prevention Methods
Growing potatoes in containers comes with unique pest and disease prevention challenges. Here are tips tailored for container potato care:
- Allow at least 12-18 inches (30-45 cm) between containers to encourage airflow. Grouped pots create humid microclimates.
- Water at the base of plants with drip irrigation or by placing pots in a tray of water. Avoid wetting foliage.
- Move containers to new locations each year and avoid planting other nightshades in used potato pots.
- Use sterile, disease-free potting mixes rather than garden soil, which can harbor soil-borne diseases.
- Inspect containers frequently. Remove any fallen or infected leaves promptly.
- Place containers up on blocks or trays to prevent pests from moving between pots.
- Use resistant varieties like Kennebec, Huron, and Dakota Diamond that fend off late blight.
- Spray plants weekly with compost tea or an allowed organic fungicide once foliage is established.
- Discard all potato plant debris after harvest; don’t compost any diseased material.
- Sterilize containers with a 10% bleach solution before reuse.
With diligent sanitation and preventive care, your container potatoes can thrive pest and disease-free. Be vigilant about not spreading issues between pots.
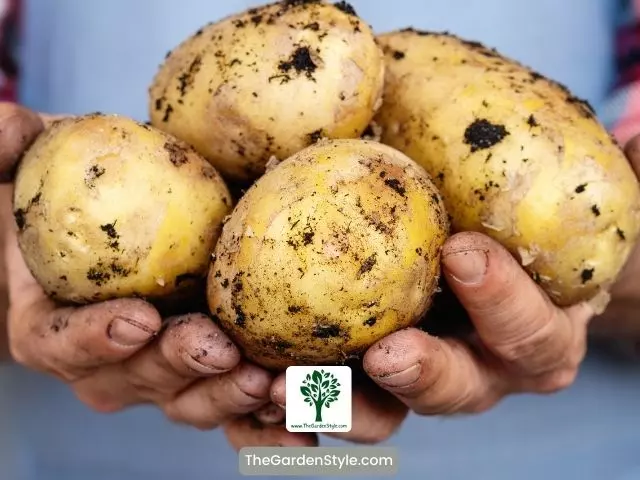
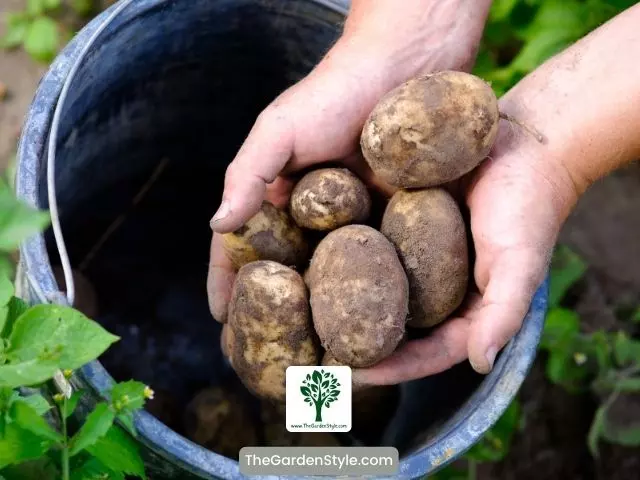
Harvesting Potatoes
Harvest new potatoes early, but wait until the plants die down entirely for mature tubers.
Early varieties are ready in 60-70 days. Midseason 80-100 days. Harvest when plants are yellow and die back.
Digging – Gently dig with a fork, taking care not to stab tubers.
Curing – Let potatoes dry in the open air for 2-3 weeks to toughen skins for storage.
Expect 1-2 pounds of potatoes per plant!
Recommended reading: When Are Potatoes Ready to Harvest: How to Know It Easily!
Troubleshooting Common Issues
Having trouble with your container potatoes? Diagnose these common problems:
- Slow Growth: This may indicate insufficient light, low temperatures, or lack of nutrients.
- Poor Yield: This can be caused by overcrowding, improper watering, or disease.
- Green Potatoes: These are the result of sunlight exposure. Keep tubers covered in soil.
Conclusion
Growing potatoes in a pot is simple and rewarding. With an enormous container, nutrient-rich soil, and proper care, you can grow a bountiful harvest! Monitor plants closely for pests and harvest potatoes at the right time for long winter storage.
Frequently Asked Questions
Use a container at least 12 inches (30 cm) deep and 18-24 (45-60 cm) inches wide. Larger containers can hold more plants.
Plant one chitted potato, 1-2 inches (2.5-5 cm) deep with a spacing of 8-12 inches (20-30 cm) between each seed potato per container.
Yes, gradually add more soil mix around the stems as they grow, keeping the base of the stems buried. This encourages more tubers to form.
Hollow heart or hollow potatoes are caused by uneven watering. Try to maintain consistent soil moisture. Sudden exposure to high levels of fertilizer prevents water and specific ions from being fully available for potato growth and may also cause a hollow potato.
Stop watering 2 weeks before you plan to harvest. This toughens skins for storage.
If this post about how to grow potatoes in a container was helpful, please share it: