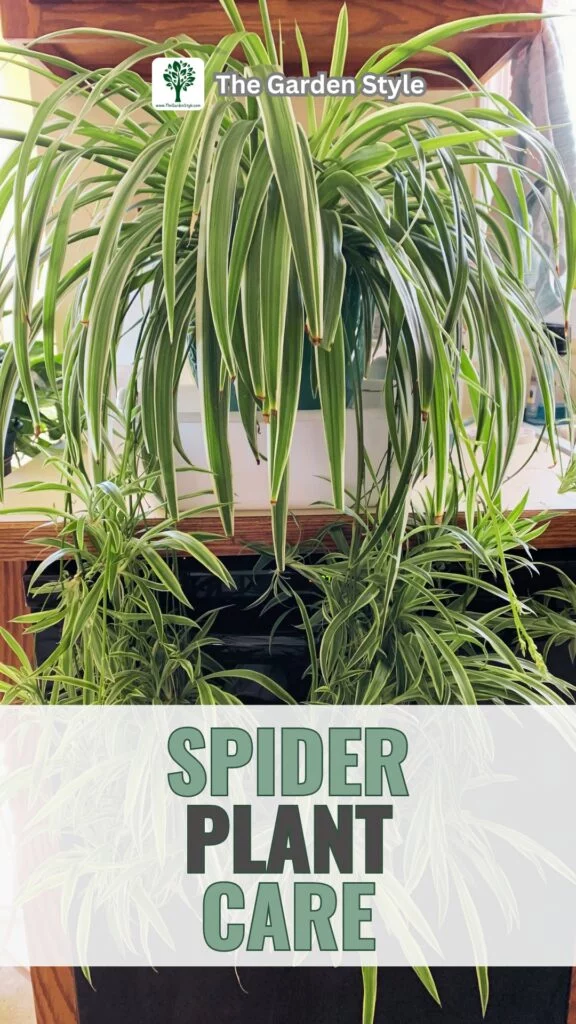
Are you looking to add some lush, trailing greenery to your indoor space without a lot of fuss? Then the spider plant (Chlorophytum comosum) is the perfect plant for you! This guide to spider plant care will show you just how easy it is to keep these enduring favorites looking their best.
Table of Contents
Spider Plant Varieties
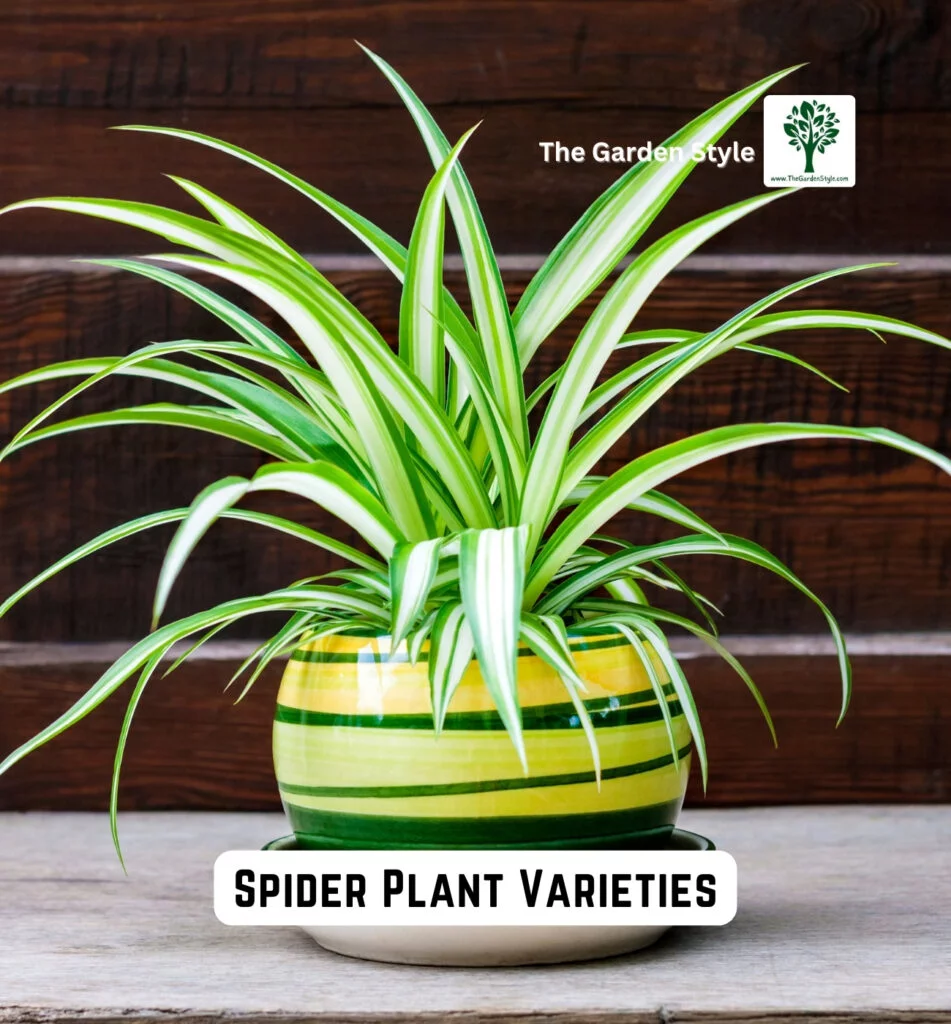
Spider plants, scientifically known as Chlorophytum comosum, come in several varieties, each with its own unique characteristics and aesthetic appeal. Here are some popular types of spider plants:
- Chlorophytum comosum ‘Vittatum’ (Green Spider Plant): This is the classic variety of spider plant, featuring long, arching leaves with a central white stripe running down the middle. It is one of the most common and easily recognizable types.
- Chlorophytum comosum ‘Variegatum’ (Variegated Spider Plant): As the name suggests, this variety of spider plant exhibits variegated foliage, with creamy white stripes or patches on the leaves. It adds a striking contrast to indoor spaces.
- Chlorophytum comosum ‘Bonnie’ (Curly Spider Plant): The ‘Bonnie’ spider plant is characterized by its curly or twisted leaves, which give it a unique and whimsical appearance. It adds a playful touch to any plant collection.
- Chlorophytum comosum ‘Zebra’ (Zebra Spider Plant): The ‘Zebra’ spider plant features bold, dark green foliage with white stripes that resemble zebra stripes, hence the name. It adds a touch of exotic flair to indoor environments.
- Chlorophytum comosum ‘Mandaianum’ (Golden Spider Plant): This variety of spider plant has vibrant, golden-yellow foliage, adding a pop of color to any space. It is prized for its bright and cheerful appearance.
- Chlorophytum comosum ‘Reverse Variegatum’ (Reverse Variegated Spider Plant): In this variety, the typical green color dominates the leaves, while thin white stripes run along the edges or margins, creating a unique reverse variegation pattern.
Each type of spider plant offers its charm and beauty, allowing plant enthusiasts to choose the variety that best suits their preferences and interior décor. Whether you prefer the classic green foliage or the striking variegated patterns, spider plants are versatile and resilient additions to any indoor garden.
How to Care for a Spider Plant
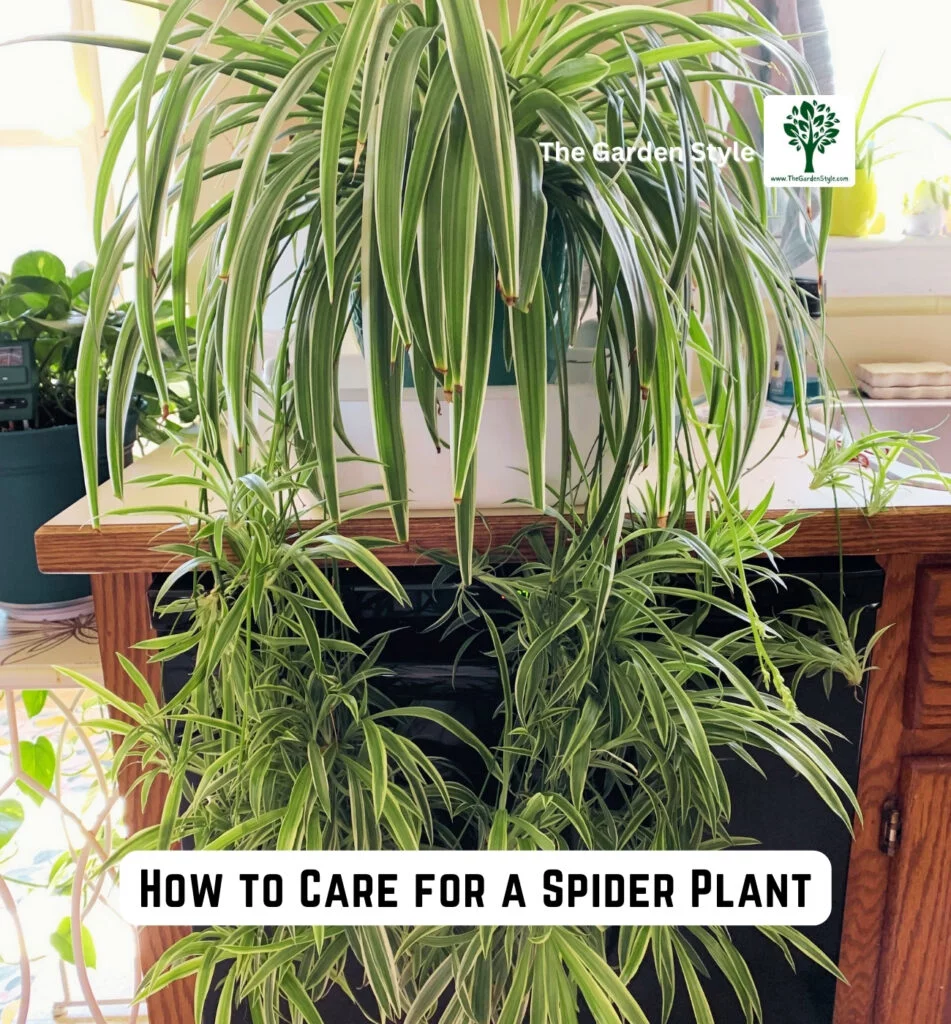
While spider plants are fuss-free, providing them with the proper care will keep them looking their best. Here’s what you need to know about the essentials of spider plant care.
Temperature and Humidity
Spider plants thrive in average household temperatures between 60°F and 80°F (15°C to 27°C). They can tolerate temperatures slightly cooler or warmer than this range but may grow more slowly. As for humidity, spider plants do well in typical indoor humidity levels and don’t require extra misting or pebble trays.
Soil for a Spider Plant
For proper spider plant care, they thrive in a well-draining soil mix that retains some moisture but doesn’t become waterlogged. Suitable soil is crucial to preventing issues like root rot when caring for spider plants.
An ideal potting mix for spider plants contains:
- Peat moss or coir – For moisture retention
- Perlite or vermiculite – For aeration and drainage
- Compost or aged bark – For nutrients and texture
- Horticultural sand or small gravel – Further improves drainage
You can purchase high-quality, pre-mixed potting soil made specifically for indoor plants. Or make your own by combining:
- 2 parts peat moss or coir
- 1 part perlite or vermiculite
- 1 part compost or bark
- 1/2 part horticultural sand
The soil should feel light and have a porous, well-aerated texture that drains easily but doesn’t compact too densely. Amending a standard potting mix by mixing in extra perlite, sand, or small pebbles can help increase drainage if needed.
Avoid using heavy garden soil or mixes without drainage additives, as these readily become waterlogged. Spider plants absolutely cannot tolerate sitting in saturated, soggy soil for long periods, which leads to root rot and plant decline. Well-draining soil is an absolute must for happy, healthy spider plants!
- 🌳 PROFESSIONALLY MIXED IN THE USA – Each bag is hand blended on our small family farm with premium horticultural grade ingredients: New Zealand Bark, Peat Moss, Perlite, Worm Castings – 2 QUART BAG
Spider Plant Light Requirements
When it comes to spider plant care, they perform best when provided with bright, indirect light. Finding the right balance of light exposure is crucial in keeping them full, vibrant, and maintaining their trademark arching form.
An east or west-facing window that gets 3-4 hours of direct morning or evening sunlight is an ideal spot. The indirect bright light will allow the leaves to achieve their best green coloration.
However, it’s essential for good spider plant care to avoid direct, intense midday sun, which can scorch the leaves. South-facing windows may provide too much direct light unless shaded with a sheer curtain.
On the other hand, too little light will cause spider plants to become leggy and stretch out with smaller, paler leaves as they expend energy seeking more light. In low light, the leaves also lose their attractive arching habit.
Signs that your spider plant isn’t getting enough light include:
- Smaller new leaves
- Pale or faded leaf color
- Elongated, sparse growth habit
- Leaning or reaching toward the light source
While spider plants can technically survive in lower light conditions, they won’t look their best or retain their fullness and vibrant color. Rotate the plant periodically to ensure even light exposure.
For optimal growth and that quintessential lush arching form, provide as much bright, indirect light as possible without direct hot sun. East or West exposure is usually perfect.
Recommended reading: 8 Best Grow Lights for Indoor Plants
How Often to Water a Spider Plant
The key to watering spider plants is allowing the soil to dry out between waterings partially. During the spring and summer growing seasons, plan to water thoroughly whenever the top inch or two of the soil is dry. In cooler months, you can let the soil dry out a bit more between waterings. Signs that your plant needs water include droopy, limp leaves. Browning leaf tips can indicate under or overwatering.
Fertilizing a Spider Plant
For proper spider plant care during the growing season, a 3-1-2 ratio liquid fertilizer is an ideal choice for feeding them. This NPK ratio provides higher levels of nitrogen to promote lush, vibrant leaf growth, along with lower levels of phosphorus and potassium when caring for spider plants.
Look for a liquid fertilizer explicitly formulated for houseplants or one made from organic sources like fish emulsion or seaweed extract. These liquid fertilizers are excellent for spider plants.
Liquid fertilizers are safer than granular types because it’s complicated to overfertilize and burn the plants when applying a diluted solution. The nutrients are immediately available but excess can be flushed out with watering.
Apply the diluted fertilizer each time you water every 4-6 weeks during the spring and summer growing period. Be sure to water thoroughly afterward to distribute the fertilizer and avoid salt buildup evenly.
In winter, when growth slows, hold off on fertilizing until early spring when new growth appears.
Using an ideal 3-1-2 liquid fertilizer ratio and taking care not to overdose allows you to provide just the right level of nutrients for vibrant, healthy spider plant growth.

- 🌿 SPIDER SENSATION: Designed exclusively for indoor spider plants, our 3-1-2 Liquid Fertilizer Concentrate provides the perfect blend of nitrogen, phosphorus, and potassium. This ensures your spider plant remains vibrant, with lush, arching foliage and countless baby spiderettes.
Common Spider Plant Problems
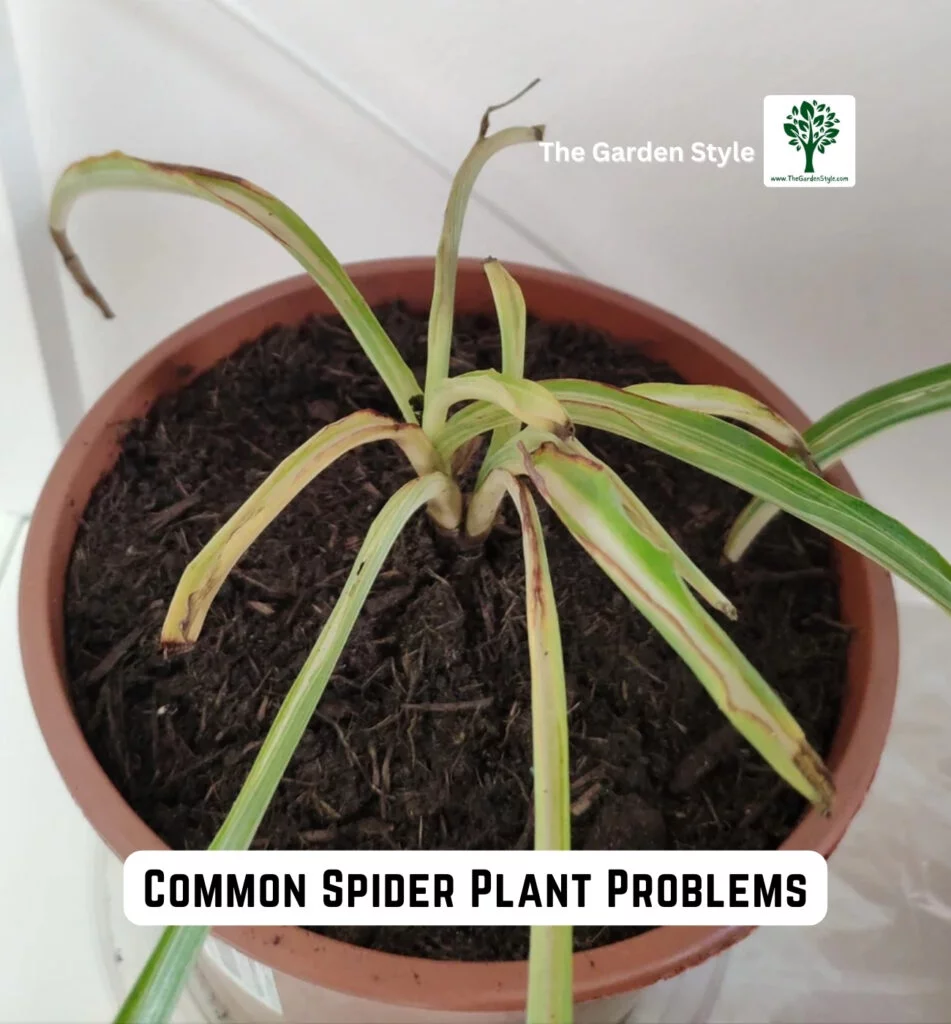
While generally trouble-free, spider plants can occasionally run into some issues. Here are some of the most common problems to watch out for.
Pests
Spider mites are aptly named because they can plague spider plants. These tiny pests create delicate webbing on the plant’s leaves and cause yellowing and leaf Drop. Mealybugs are another pest to watch for – they look like little cotton balls and cluster where leaves meet stems, feeding on plant sap.
For both spider mites and mealybugs, isolate the affected plant and treat it with insecticidal soap or neem oil, following all product instructions carefully. Good cultural practices like proper watering and cleaning plant leaves periodically can help prevent pest infestations.
Diseases
Root rot from overwatering or poor drainage is the most common disease issue for spider plants. Mushy, smelly roots and yellowing leaves are signs of this fungal disease. The best cure is repotting into fresh, well-draining soil after removing all rotted roots and plant matter.
Leaf spots or blotches can indicate a fungal or bacterial disease, though these are less common on spider plants than root rot. Removing affected leaves and improving air circulation around the plant may help.
Other Issues
Browning leaf tips often indicate under or overwatering or that the plant is stressed from low humidity, excess fertilizer, or salt buildup in the soil from hard water. Legginess with elongated stems and smaller leaves is a sign the plant isn’t getting enough light.
Providing proper watering, humidity, light levels, and periodic leaching of the soil can usually resolve these issues. Pruning off brown tips and leggy growth can also rejuvenate the plant’s appearance.
Recommended reading: Spider Plants with Brown Tips – All You Need to Know
How to Propagate a Spider Plant
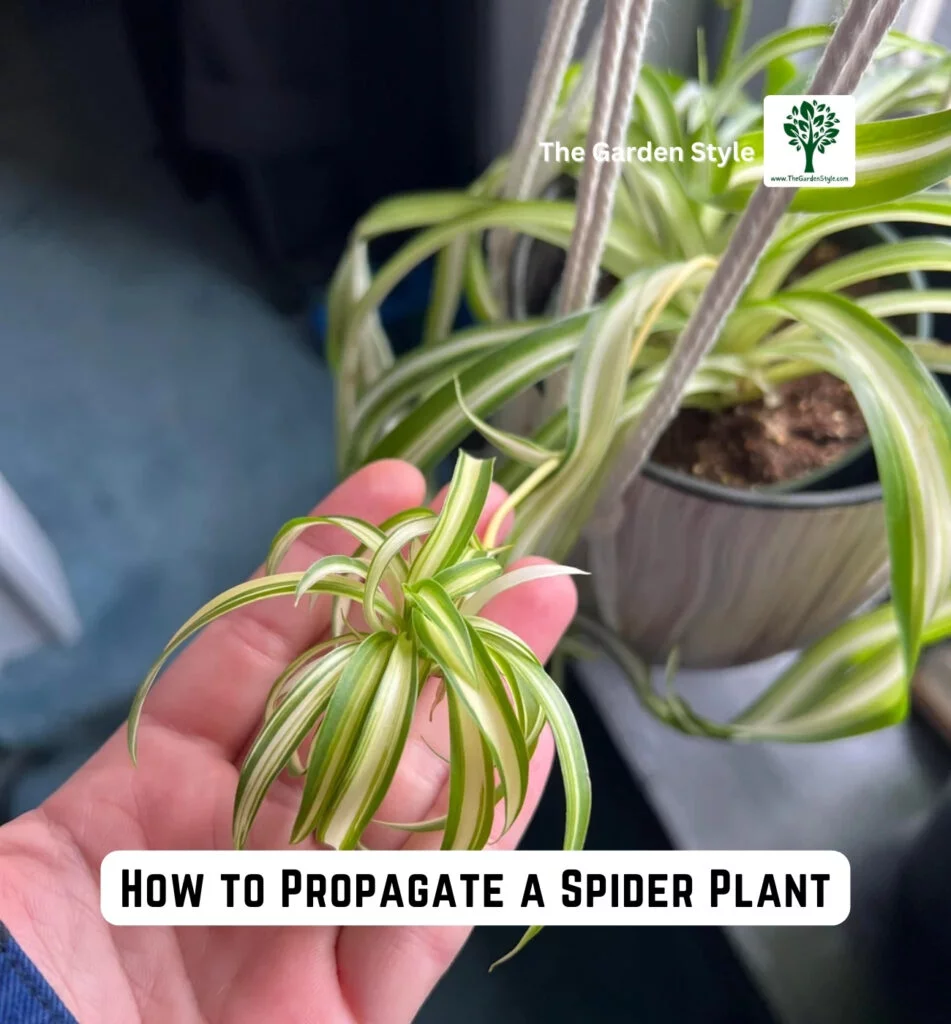
Spider plants are among the easiest houseplants to propagate thanks to the profusion of plantlets they produce. You can multiply your plant collection for free using one of these simple methods:
Propagating from Plantlets
- Look for the tiny offshoots or “pups” dangling from the ends of the spider plant’s arching stems.
- Once plantlets have developed small roots, use clean scissors or pruners to snip them off the main plant stem.
- Fill a small pot with a well-draining potting mix and make a hole in the center.
- Carefully transfer the plantlet to the hole, being careful not to damage the delicate roots. Gently firm the soil around the base.
- Water thoroughly after potting and place in a bright, indirect light location.
- Keep the soil moist but not saturated until new growth appears, indicating the plantlet has rooted.
Propagating by Division
- Remove the spider plant from its pot and gently loosen the rootball.
- Using your hands or a clean trowel, carefully tease apart the root system into two or more sections with their roots and leaves.
- Prepare new pots with drainage holes and fresh potting mix.
- Replant each root division into its pot at the same depth as before, firming the soil gently.
- Water in well and place in a bright spot to establish.
Both plantlet propagation and division allow you to multiply your spider plant collection easily. Just provide bright light, well-draining soil, and proper watering for the new starts.
Recommended reading: How to Propagate Spider Plant in Water.
How to Repot a Spider Plant
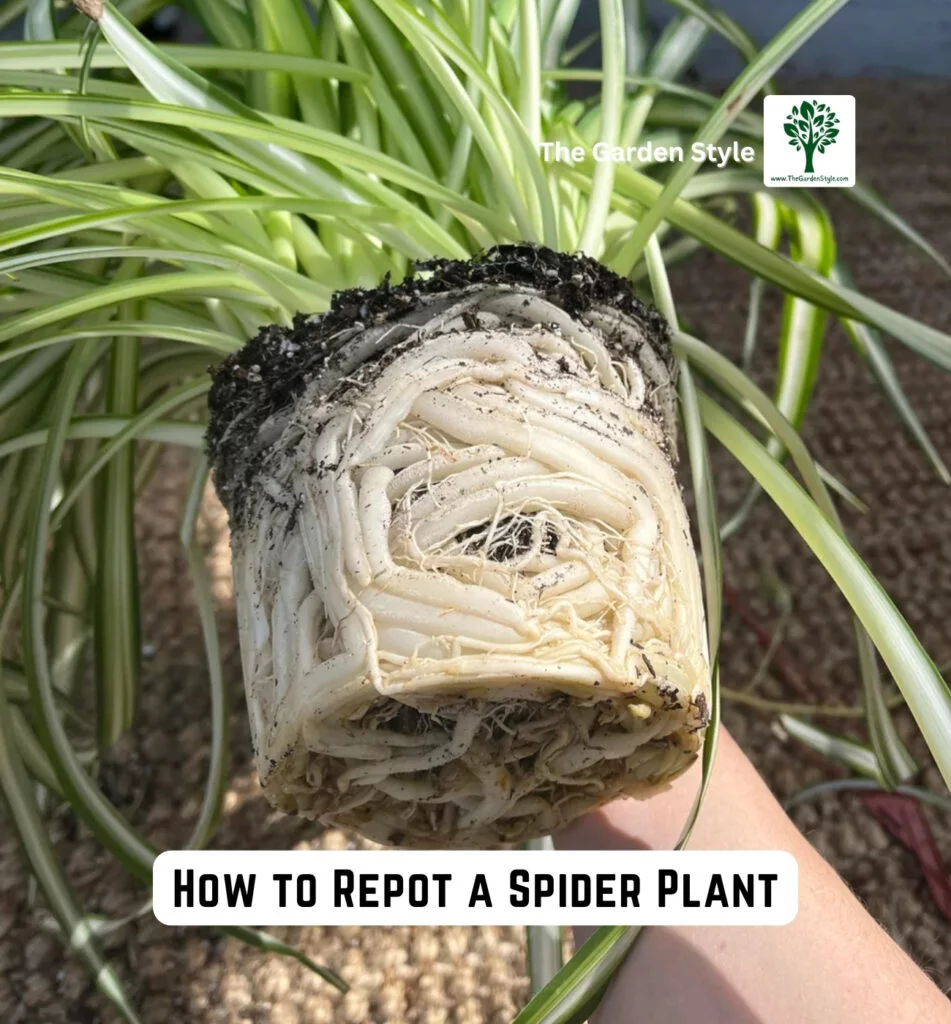
Spider plants don’t need frequent repotting, but they’ll appreciate being given some fresh soil and a bit more room every couple of years. The best time is in late winter or early spring before their growth kicks into high gear.
When to Repot:
- Every 2-3 years or when roots are crowding the pot
- In late winter or early spring, before active growth
- Choose a new pot only 1-2 inches wider than the current one
What You’ll Need:
- New pot with ample drainage holes
- Well-draining potting mix
- Sharp scissors or pruners
- Your spider plant
Repotting Steps:
- Water the plant a day before repotting to hydrate the roots and make it easier to remove from the current pot.
- Prepare the new pot by covering the drainage holes with mesh screening or broken pottery shards. Fill halfway with fresh potting mix.
- Gently remove the plant from its current container by tipping it sideways and carefully pulling on the leaves to dislodge the rootball.
- Use a clean pruner or scissors to trim off any dead, damaged, or circling roots to encourage new growth.
- Make a hole in the center of the new pot’s soil and set the plant’s root mass into the hole at the same depth it was previously growing.
- Backfill around the rootball with potting mix, gently pressing to compact it and secure the plant.
- Water thoroughly from the top until moisture drains from the bottom to settle the plant.
- Add a thin top dressing of fresh potting mix if needed to bring the soil level just below the pot rim.
Keep your newly repotted spider plant out of direct sun for a week or two while it recovers and adjusts to the fresh soil. Withhold fertilizer for 4-6 weeks until new growth appears.
Repotting every few years keeps spider plants vigorous by providing room for roots to spread and nutrient-fresh soil to feed on!

- 【Modern Simple Design】A simple modern aesthetic and clean matte finish hanging planters,indoor plants bringing out a minimalistic styled. the pots with the hanging planter are perfect for indoor plants of different colors ,brings out a modern stylish visual representation for any home/office decor without any sense of violation.
Final Conclusions
With their easy-going nature and minimal care needs, it’s no wonder spider plants remain such enduring favorites! Give them some basic requirements like bright, indirect light, well-draining soil, and proper watering, and these charming trailing plants will grace your home for years.
Frequently Asked Questions
There’s no set schedule, but a good rule of thumb is to water spider plants thoroughly whenever the top 1-2 inches of soil is dry during the growing season, allowing the soil to dry out slightly more between waterings in winter.
Browning leaf tips can indicate under or overwatering, low humidity, excess fertilizer, or salt buildup in the soil. Try adjusting your watering, leaching the soil occasionally, and using fertilizer sparingly.
While spider plants can tolerate lower light levels, they need bright, indirect light to really thrive and maintain their arching shape and leaf color. Very low light will cause them to become leggy and lose their fullness.
Spider plants are known for their longevity and can live for several years with proper care. On average, a well-maintained spider plant can live for up to 5 to 10 years or even longer in some cases.
Yes, spider plants can grow in water, although they typically thrive better in soil. Growing spider plants in water involves a process called hydroponics, wherein the plant’s roots submerge in water rather than soil.
If this post about Spider plant care was helpful, please share it: