When repotting an orchid, it is necessary to have a couple of basic skills to make the process successful. We are going to teach you how to repot orchid correctly, how and when to do it, the materials to use, and the steps.
In addition, in this article, you will also learn the steps to follow to repot orchids with flowers into a larger container or a more suitable material or to repot them into a trunk.
Table of Contents
When to Repot Orchid
Orchids are plants that do not usually need to be repotted regularly, in fact, it is generally recommended that this be done every two years at the most. There may also be other factors that indicate that your orchid needs a transplant:
1- When the recipient, pot, or bed where the plant is located has become too small. If the roots of our plant start to overflow too much, this is an indication that the orchid will be better off in a slightly more ample space. Still, it is good to remember that the more enclosed the place where it grows, the more abundant the flowering will be.
2- When the substrate has been compacted and does not drain optimally. This causes water retention to become more acute and parts of the plant to decompose from exposure to water continuously.
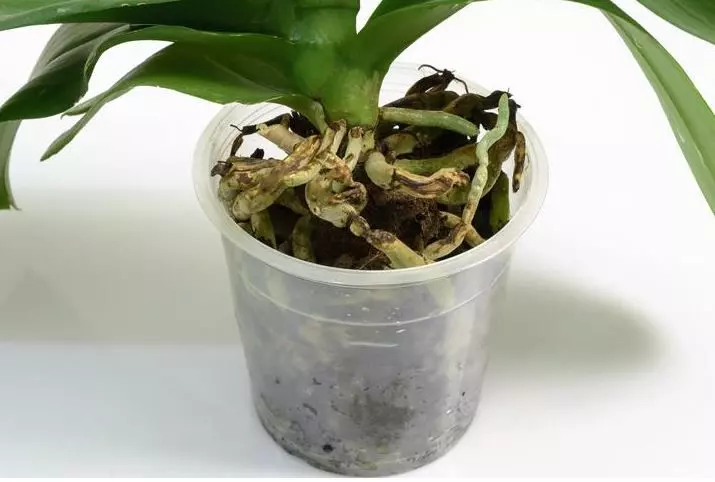
3- When the plant is deteriorated by a possible plague or fungal infection. This event is easily recognizable since the roots have a brown or darker color than usual, also, its intense green leaves turn yellow.
Do not forget that in the case of repotting an orchid, it should be done when the plant is in a dormant state, just after flowering.
Repotting Orchid into a Bigger Container
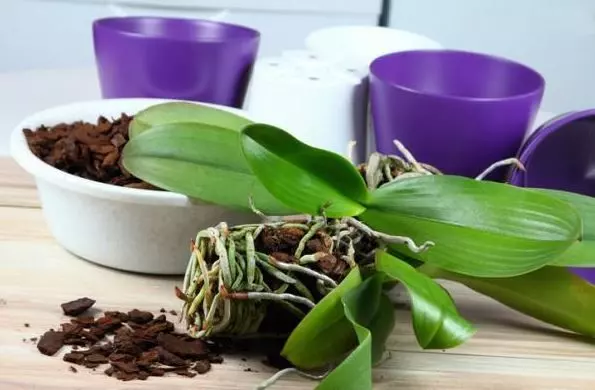
Before repotting the orchid, the substrate of the plant must be slightly moistened so that when the roots are removed, you can avoid breakage and possible injury. Both the tools used to carry out a light pruning of parts of the plant in bad condition, since it is necessary to take advantage of the moment of the repotting to take care of this aspect, and the recipient where we are going to plant it must be clean and disinfected. We also recommend you to use fungicides during this process to prevent possible diseases during the transplant.
To repot an orchid into a bigger pot because the current one is too small, follow these simple steps:
1- Choose a container that is transparent or that allows the roots to capture sunlight easily for photosynthesis. There are pots for orchids that already incorporate a bottom to facilitate drainage.
2- Place pebbles or expanded ceramic balls in the new pot that you can find in any garden center. The rest should be covered with a special orchid substrate, with a pine or fir base, avoiding compacting it so that the roots can move freely.
3- In the case that you have cut roots in bad condition, it is better to reserve the plant without watering it for a couple of days so that the wounds produced by the pruning close to avoid infections.
4- It is not recommended to use much fertilizer. It is better to let some time pass before giving it a more generous dose. Always use specific fertilizer for orchids.
5- Place your orchid near a lighted area with a moderate temperature to facilitate its growth.
Learn more about Repot Orchid in this post.