Getting into worm composting is an easy process if you follow our advice. In just a couple of hours, you will create the perfect environment for your worms in the composting bin. Learn how to build a worm composting bin step by step in this post.
Table of Contents
Here Are The Steps To Make Your Own Worm Composting Bin
Step 1: Get a large container (about 10 gallons – 40 Liters). Here, you have several options.
Container Options to Make Your Compost Bin
You can use a dark plastic container with a lid, inexpensive (approx. 5-10 USD) to buy in supermarkets. Proceed to wash its interior with water and detergent, even if it is new, just bought. Rinse it well so that there are no residues from the plastic process that could harm the reproduction of the worms.
Styrofoam container. It is also an economical option. Clean and rinse before use.
Wooden Container or wooden crate. It is recommended to cover the interior with plastic.
Step 2: Add ventilation and drain holes. You will need to drill and create holes in the bottom to drain the compost tea. You can place a plastic faucet to facilitate your collection. Additional holes can be made in the sides to allow the container to have better ventilation.
Step 3: Create a “bed” out of newspaper strips (about 50 sheets), preferably black and white, without colored ink, and place them inside. Add water to moisten the paper. It should not be flooded, just damp.
Step 4: Add about 2-4 cups of soil to the container, sprinkling the soil so that it is loose.
Step 5: Add your worms!!! If you are going to keep a journal, be sure to record how many worms you started with. For this, you can weigh them. To start with a 10-gallon container, you will need approximately one pound (450 grams). Californian Red Worm has a very high reproduction rate; therefore, it will consume a large amount of food.
Step 6: Feed your worms. Spread food scraps all over the bed, even under it.
Mobilizing the soil allows nutrients to be distributed, moisture equalization, and aeration of the soil, which must always be loose.
Step 7: Finally, place some sheets of newspaper or dry cardboard on top to maintain the humidity level. Adding water and mixing may be necessary every 2 days or 7 days, depending on the humidity. Remember only to keep moist, not flood.
Step 8: Add a lid to your container. You can use breathable material such as a small mesh or a fabric. Another option is to leave the lid half-open or drill a few holes. This will prevent condensation inside the container and, at the same time, improve airflow.
Step 9: Position the container in such a way as to give it a small pendant. You can position it on some bricks. You can easily drain the compost tea through the inferior holes or use the faucet mentioned in step 2.
Step 10: Remember to feed your worms weekly, spray with water as needed, and refill the newspaper bed when needed.
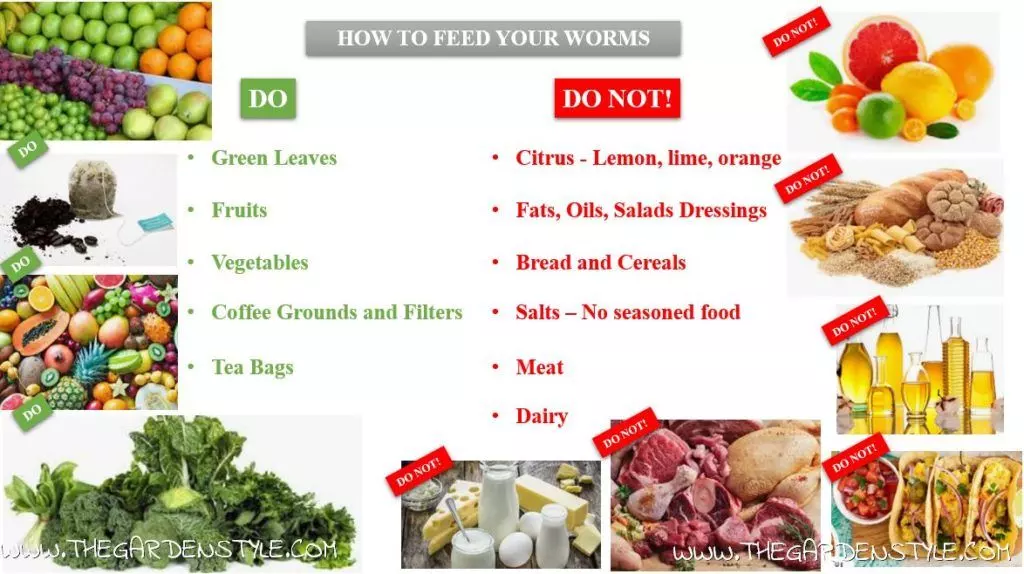
Worm Composting Bin: How to Feed Your Worms
First, prepare the right food scraps for your worms. Make sure to cut the pieces of food into small pieces. Bacteria and certain fungi will first decompose the food, and then it will be used by worms when the decomposition has already begun. Small pieces make this process easier. In this step, the food will be less available to the worms, creating less worm composting.
Second, always keep your food scraps refrigerated and covered until you give it to the worms. You will avoid unwanted contamination, such as fruit flies.
Then, select the right food for the worms. Do not use meat, bones, dairy, oils, or human feces. Use fruits and vegetables, and erase coffee and tea. You will see that some fruits like bananas and mangoes turn out to be his favorites. If you keep a journal, you can record the amounts of food and distribution. Avoid citrus as they can drastically affect the pH.
Lastly, use the necessary amount of food according to the weight of the worms. The worms will need about 3 times their weight per week. If the environment is conducive, the worms will reproduce without the inconvenience, and the consumption of food will increase.
Recommended Related Posts:
Red Worms Farm: How to Make Your Own Box
Red Worm: How to Reproduce Californian Worm
How to Dispose of Grass Clippings